Crispy, Crunchy Kale Chips
I’ve been on a quest for a while to bake the perfect kale chips. Over the years, I’ve tried and failed. Tried and failed. For a while, I let failure carry the day and I gave up trying. It wasn’t until I needed good, healthy, kid-friendly options to fill my kids’ lunch boxes that I revisited the kale chip. It took some research, but there are a series of steps that make this so much easier than you might expect and so much better than what I had experienced in the past.
Here’s how to do it:
- First, you want to start with Lacinato Kale, also sometimes referred to as Tuscan kale, Tuscan cabbage, Italian kale, dinosaur kale, black kale, flat back cabbage, palm tree kale, black Tuscan palm (1). Lacinato Kale has a sweeter, less bitter flavor than its relatives in the kale family. You also want to preheat my oven to 350 degrees at this stage.
- Thoroughly wash the kale leaves. I generally do this in the colander and as I rinse each leaf, I tear the leaf away from the stem in small, bit size pieces putting each piece into my salad spinner as I go. This part is, admittedly, a pain but the end result is worth it!
- Working in batches so as not to overwhelm the salad spinner, I dry the torn leaves. In the past, I have knocked the salad spinner as just another unnecessary tool taking up space in my kitchen. Kale chips changed that for me and, frankly, now I use it all the time to dry lettuce and other herbs.
- Once the leaves are dry, I put them all into a mixing bowl. Then, I’ll drizzle them with a little bit of olive oil — I estimate this to be able a tablespoon and I find that a little bit goes a long way. Now, here’s the trick. I massage the kale. Not quite as intensely as I might for a salad (i.e. the more you massage the more tender the leaves become), but I do like to break down the stiffness of the leaves. I think it improves the flavor as well as the texture. As you do this, the leaves will become softer and start to darken. As you’re doing this, you’ll be coating each of the leaves with the olive oil. [perfectpullquote align=”right” bordertop=”false” cite=”” link=”” color=13ca35″” class=”” size=”22″]Now, here’s the trick. I massage the kale.[/perfectpullquote]
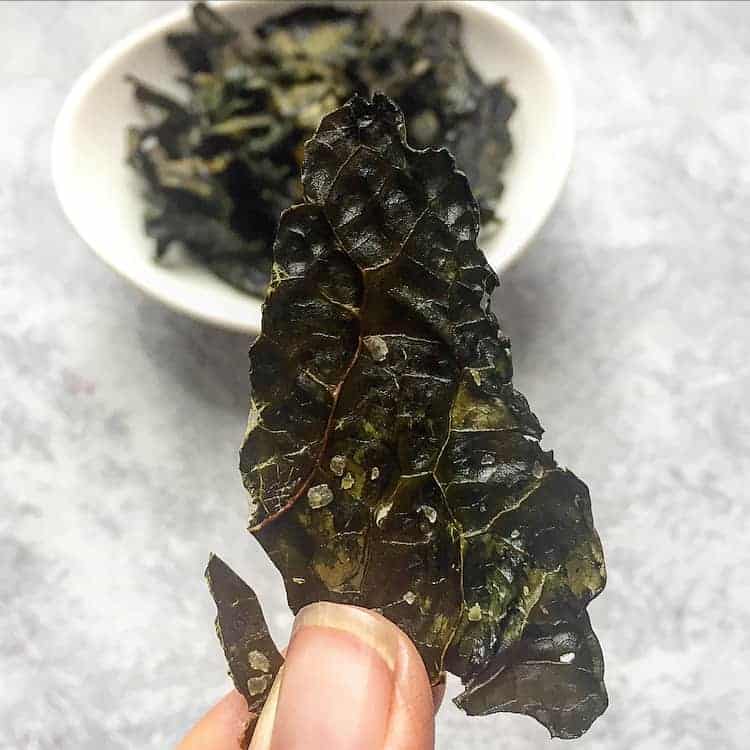
- Then, spread the leaves out on a jellyroll pan. Typically, I use 1 jellyroll pan for each 2 bunches of kale leaves I prepare. I used to worry about getting the leaves spread out so that weren’t overlapping, but I find that this is just a lot of unnecessary effort. Once spread out, I sprinkle my seasoning on the kale. I’m a big fan of just sprinkling a little salt on them, but just recently I came upon a new salt company in my small Colorado hometown and it’s taken by kale chips to the next level. Steamboat Salt Company offers four different salt flavors. My favorite, El Jefe, is a garlic, habanero pepper and salt blend that makes my kale chips all that much better.
- Once seasoned, pop the kale chips into your preheated over and set the timer to 10 minutes. Then, with a spatula, mix the kale chips and spread them out on the pan again. You’ll notice that they shrink as they start to crisp. Set the timer for another 10 minutes, mix and spread again. You may find that the chips are crispy and done here, or if you feel like they’re still a little soggy, continue to keep an eye on them.
- Once baked until crisp, let the kale chips cool on the jellyroll pans. Here’s the other trick. Don’t store then in a plastic bag or an airtight Tupperware container. It just makes the soggy again. Instead store then all in a paper bag. Or, consume them immediately.
Do you make kale chips? Any tricks or special seasonings you’d like to share? We love trying new things!
Did you make these kale chips? Be sure to share your stuff on Instagram with the hashtag #HerbivoresKitchen